![CICD流水线搭建流程 [GitLab + Ubuntu]](/images/CICD/cicd.svg)
CICD流水线搭建流程 [GitLab + Ubuntu]
Prerequisite
- GitLab 仓库
- Ubuntu (18.04/20.04/22.04) 服务器
- 编程语言runtime
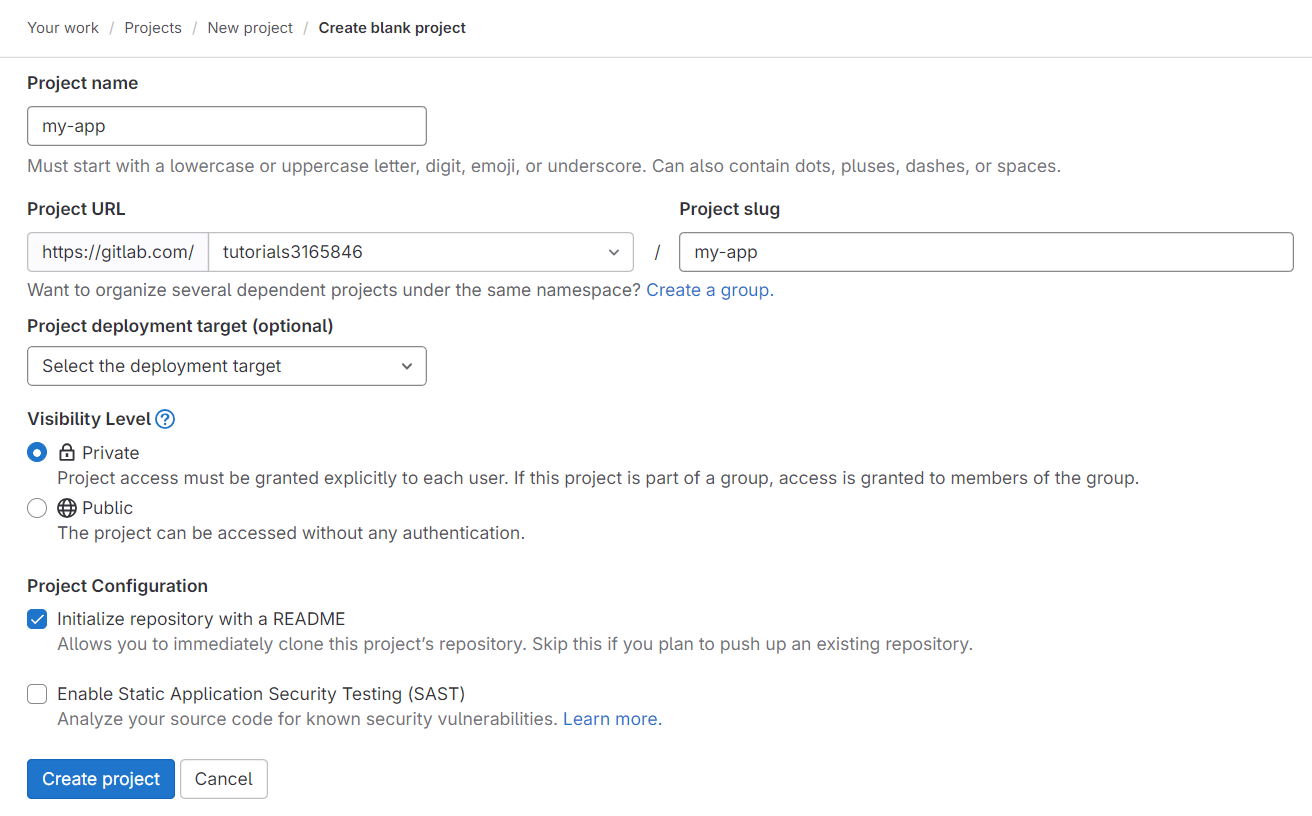
1. 创建GitLab仓库
2. 创建GitLab Runner
服务器上先安装gitlab-runner服务 1
sudo apt-get install gitlab-runner
检查安装是否成功 1
systemctl status gitlab-runner
会显示 1
2
3
4
5
6
7● gitlab-runner.service - GitLab Runner
Loaded: loaded (/etc/systemd/system/gitlab-runner.service; enabled; vendor preset: enabled)
Active: active (running) since Mon 2020-06-01 09:01:49 UTC; 4s ago
Main PID: 16653 (gitlab-runner)
Tasks: 6 (limit: 1152)
CGroup: /system.slice/gitlab-runner.service
└─16653 /usr/lib/gitlab-runner/gitlab-runner run --working-directory /home/gitlab-runner --config /etc/gitlab
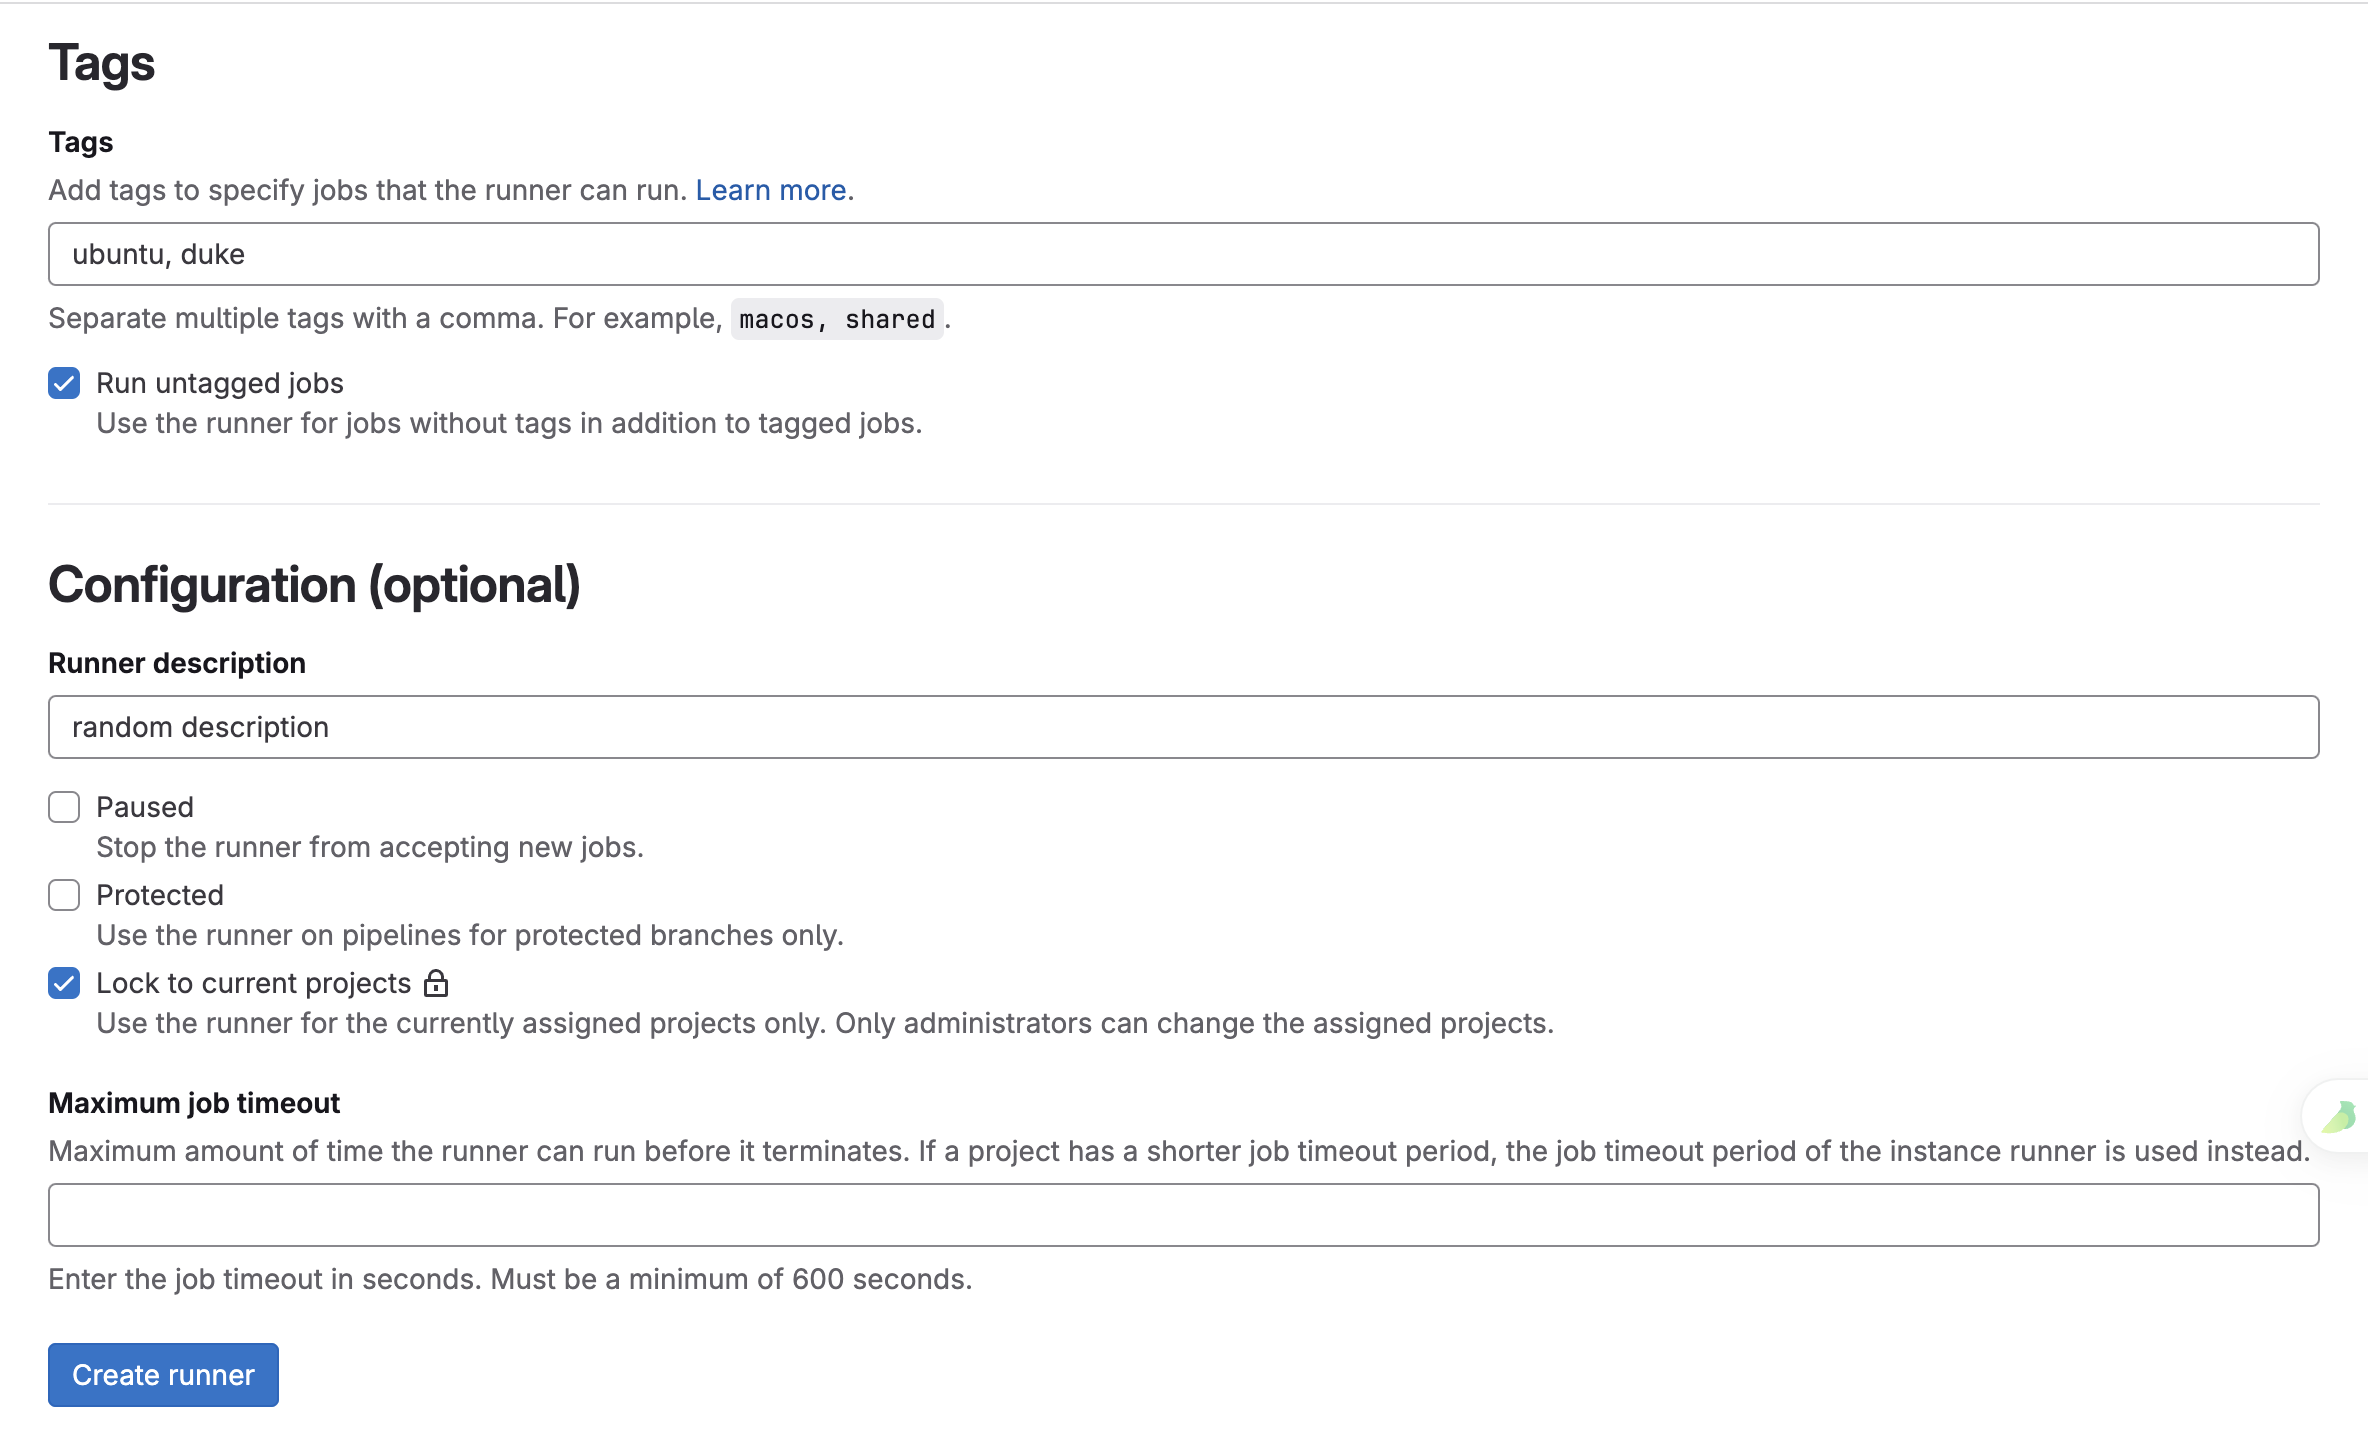
其次在GitLab上进行绑定,进入仓库 - Settings - CICD - Runners

点击 New Project Runner,
然后写一下tag和description(确保你知道这个是那个服务器和干什么的),然后选中
Run untagged project,确保你不会因为该项目没有tag而无法在runner上跑
3. 绑定gitlab-runner和服务器
当 gitlab-runner
注册之后,需要在服务器上进行token绑定
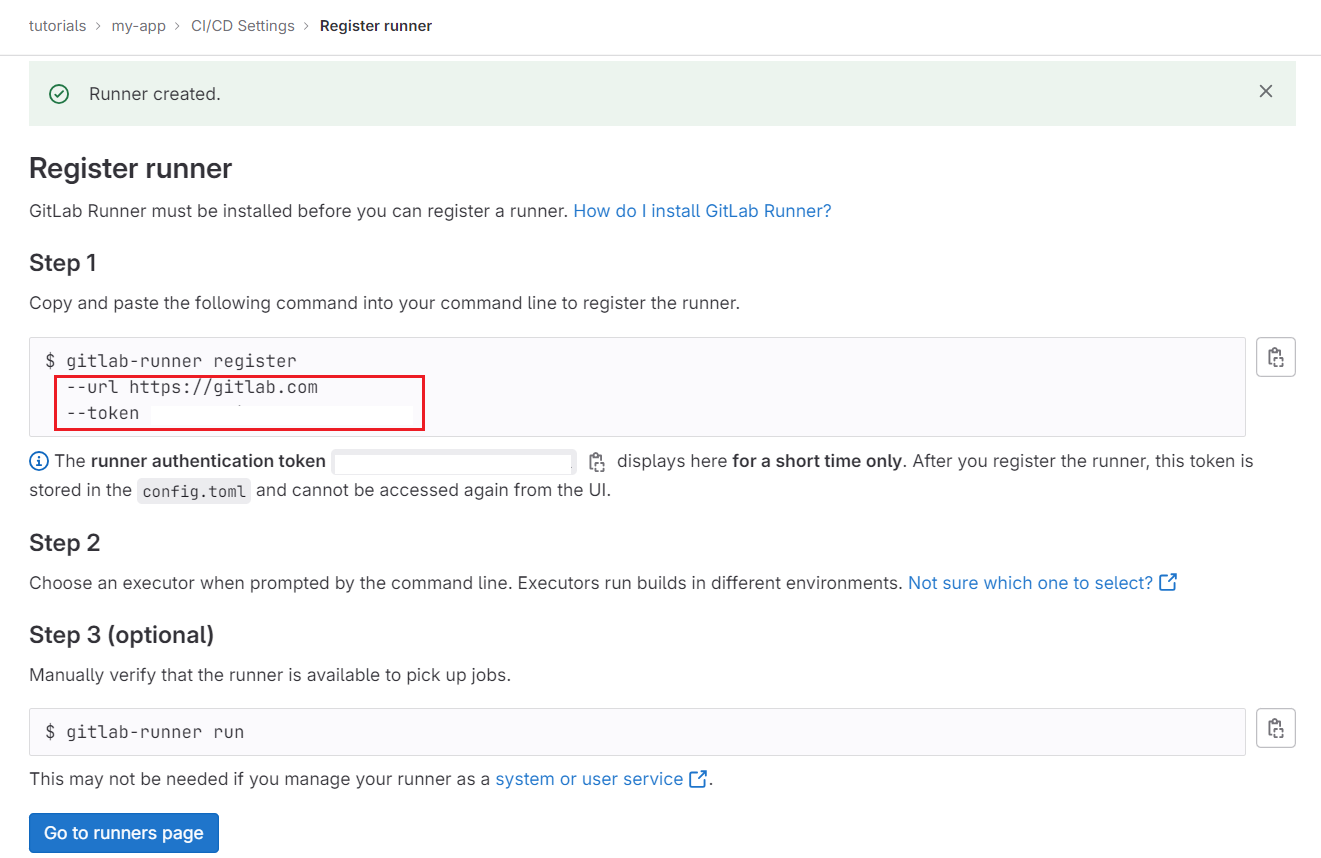
输入基础命令 1
gitlab-runner register --url [project_URL] --token [runner_token]
- executor: 参照gitlab官方给出的executor类型,我们因为是个小项目,暂时没有使用docker,所以选择shell
- docker-image: 如果选择docker作为executor的话,就会要求配置docker镜像
- description: 描述一下 等信息,其它我没遇到,遇到了再记录
4. 编写 .gitlab-ci.yml
首先是要填写流水线的阶段 1
2
3
4stages:
- build
- test
- deploy
其次是各阶段所需要的命令和生成的文件单独列举出来,因为我们这个是个springboot项目,每次推送main分支之后就会进行maven编译,生成target文件夹下的jar包,然后在java runtime运行,流水线思路简单。
1 | build: |
其中 1
2
3
4
5
6- |
while pgrep -f "$APP_NAME" > /dev/null; do
pkill -f "$APP_NAME"
sleep 1
done
- nohup java -jar $DEPLOY_PATH/$APP_NAME --spring.profiles.active=prod > $DEPLOY_PATH/app.log 2>&1 &
Reference
- How To Set Up a Continuous Deployment Pipeline with GitLab CI/CD on Ubuntu https://www.digitalocean.com/community/tutorials/how-to-set-up-a-continuous-deployment-pipeline-with-gitlab-on-ubuntu
- Use CI/CD to build your application https://docs.gitlab.com/ee/topics/build_your_application.html
CICD流水线搭建流程 [GitLab + Ubuntu]